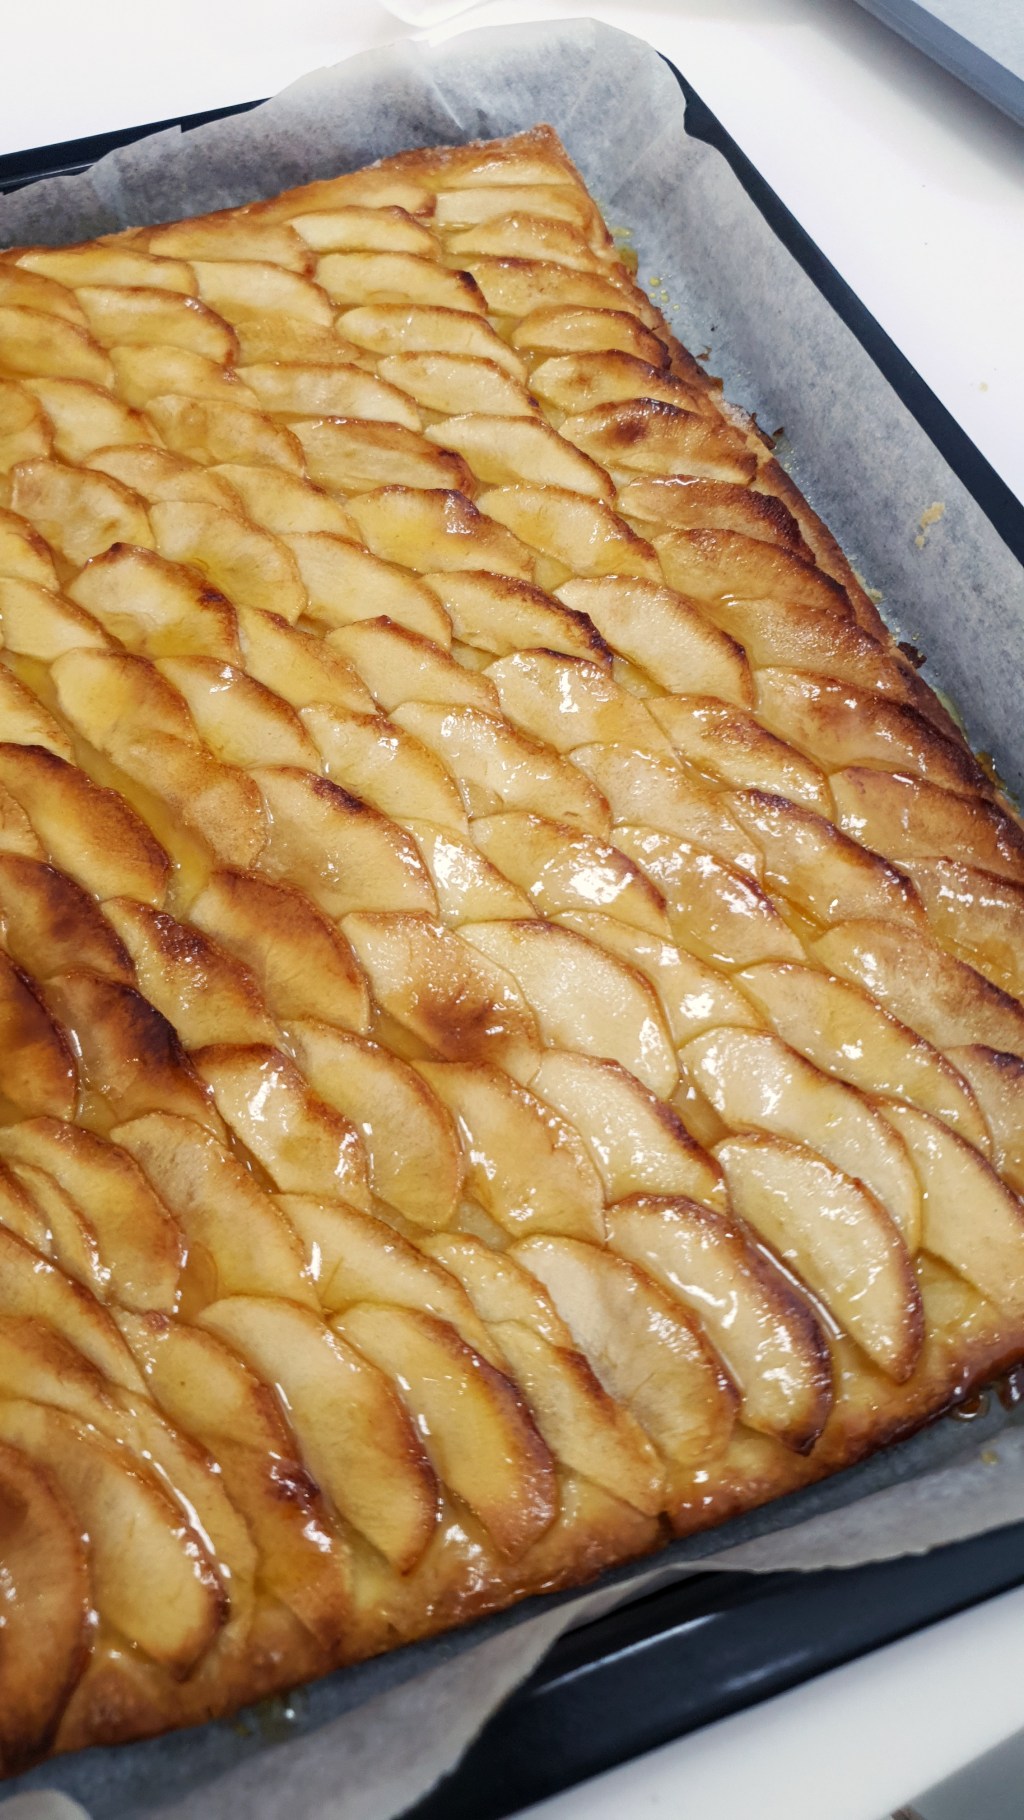
French Apple Tart – Tarte aux Pommes
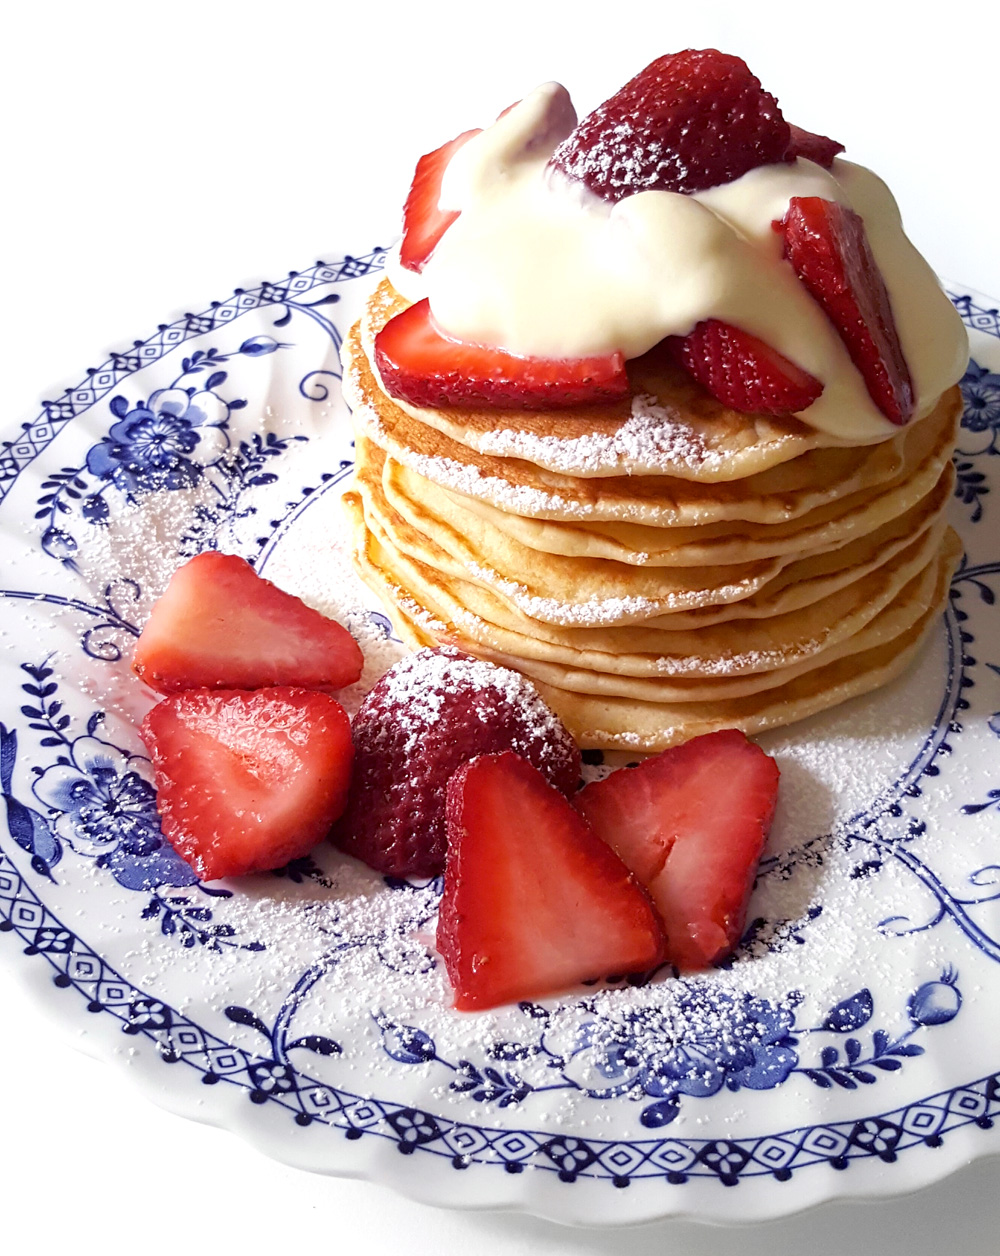
I made this apple tart last week and it was so good we finished it in 2 days! I just had to share it with you. The original recipe is adapted from The Food Network, you can check it out too! The only difference is that I made the crust by hand instead of in a mixer and did not use Calvados to glaze the apples after. I sliced my apples pretty thin this time, you might want to cut them thicker if you want to have more bite to it, if you slice them too thin they tend to get a bit “leathery” after baking.

I wouldn’t leave the dough in the fridge for too long because if it gets too hard, it’s difficult to roll out and you’ll need to wait for it to thaw before you can work on it so maybe check on it at intervals when it’s in the fridge, as long as it’s not soft, you’re good!

For the pastry:

  • 2 cups all-purpose flour
  • 1/2 teaspoon kosher salt ( I used regular table salt)
  • 1 tablespoon sugar
  • 1½ stick of butter (I used 170 grams)
  • ½ cup ice water

For the apples:

  • 4 Granny Smith apples (I used Pink Lady apples)
  • ½ sugar
  • ½ stick cold unsalted butter (I used 60 grams of salted butter)
  • ½ cup apricot jelly or warm sieved apricot jam
  • 2 tablespoons Calcados, rum, or water

Instructions:

  1. For the pastry, I did it by hand but you can also use a food processor following the original recipe! Place the flour, salt, and sugar in the bowl of a food processor fitted with the steel blade. Pulse for a few seconds to combine. Add the butter and pulse 10 to 12 times, until the butter is in small bits the size of peas. With the motor running, pour the ice water down the feed tube and pulse just until the dough starts to come together. Dump onto a floured board and knead quickly into a ball. Wrap in plastic and refrigerate for at least 1 hour. 
  2. Preheat the oven to 400 degrees F. Line a sheet pan with parchment paper. 
  3. Roll the dough slightly larger than 10 by 14-inches. Using a ruler and a small knife, trim the edges. Place the dough on the prepared sheet pan and refrigerate while you prepare the apples. 
  4. Peel the apples and cut them in half through the stem. Remove the stems and cores with a sharp knife and a melon baller. Slice the apples crosswise in 1/4-inch thick slices. Place overlapping slices of apples diagonally down the middle of the tart and continue making diagonal rows on both sides of the first row until the pastry is covered with apple slices. Sprinkle with the full 1/2 cup of sugar and dot with the butter. 
  5. Bake for 45 minutes to 1 hour, until the pastry is browned and the edges of the apples start to brown. Rotate the pan once during cooking. If the pastry puffs up in one area, cut a little slit with a knife to let the air out. When the tart’s done, heat the apricot jelly together with the Calvados and brush the apples and the pastry completely with the jelly mixture. I didn’t have Calvados so I just used apricot jam and water. Loosen the tart with a metal spatula so it doesn’t stick to the paper. Allow to cool and serve warm or at room temperature.

Happy baking & stay safe!

Pancakes Please!

I love pancakes, and once you’ve tried pancakes with fresh strawberries and freshly whipped Chantilly cream, there’s just no going back.

20160908_150139

If you prefer taking the easy route and using a pre-mix, whipping up some Chantilly cream will take you no more than 10 minutes, but if you’re feeling a little adventurous and want to make your pancakes from scratch, here’s a recipe that works for me. Bon appetite! :)

Ingredients :

  • 1½ cups plain flour
  • 3 teaspoons baking powder (NOT SODA! Orginal recipe uses 3½ teaspoons)
  • ½ teaspoon salt (Original recipe uses 1 teaspoon)
  • 1 tablespoon white sugar
  • 11⁄4 cup milk
  • 1 egg
  • 3 tablespoons butter, melted and cooled

How to :

  • In a large bowl, sift together the flour, baking powder, salt and sugar. Make a well in the center and pour in the milk, egg and melted butter; mix until smooth.
  • Heat a lightly oiled (I use butter) frying pan over medium high heat.
  • Pour or scoop the batter onto the griddle, brown on both sides and serve warm.

Tips :

  • Wait till you see bubbles popping in the centre before flipping.
  • Do not pat on your pancakes while cooking!
  • You can whip up a whole batch of Chantilly cream and keep them stored in the freezer, they freeze really well.
  • Sift some icing sugar over your pancakes and strawberries, this will help with sweetening sour berries!

The Discovery of Key Lime Pie

A few months back while talking to someone, “key lime pie” came up in the conversation.

I’ve heard of key lime pie before but never tried it, or even seen them on dessert menus here… So being the curious cat that I am, I decided to bake one!

11027942_10155655754820788_1353442777275119249_n

My first key lime pie and I fell in love with it, everything about it.

It was tangy, it was refreshing, it was just… WOW. I don’t know for sure if digestive biscuits are considered graham crackers, but they work fine for me as a substitute. In fact I always use digestive biscuits when a recipe calls for a graham cracker crust.

Here’s the original recipe from Joe’s Stone Crab Restaurant in Miami! Trust me, it’s totally worth the time and effort. I’m definitely baking another one of these soon.

What You’ll Need:
  • 3/4 cup graham cracker crumbs
  • 5 tablespoons butter, melted
  • 1/3 cup sugar
  • 3 egg yolks
  • 1 1/2 teaspoons grated lime zest
  • 1 (14-ounce) can sweetened condensed milk
  • 2/3 cup Key lime juice (see Tips)
What To Do:
  1. Preheat oven to 350 degrees F. Coat bottom of a 9-inch pie plate with cooking spray.
  2. In a medium bowl, combine graham cracker crumbs, butter, and sugar; mix well then press mixture over bottom and up sides of prepared pie plate to form a crust; set aside.
  3. In a medium bowl with an electric mixer on medium speed, beat egg yolks and lime zest 5 minutes, or until fluffy. Gradually add sweetened condensed milk and continue beating 3 to 4 minutes. Reduce speed to low and gradually beat in lime juice just until combined. Pour filling into pie crust.
  4.  Bake 10 minutes, or until firm in the center. Remove from oven and let cool on a wire rack, then cover and chill at least 2 hours before serving.
Tips
  • If you can’t find fresh Key limes or Key lime juice, it’s okay to substitute regular limes, even though it won’t be exactly the same.
  • This is best served very cold, so we recommend placing it in the freezer for 15 to 20 minutes before serving.
  • Just before serving, top pie with whipped cream or whipped topping and garnish with lime slices, if you’d like.

Eat my heart.


Honey pancakes with buttered bananas and strawberries.

Made a beeline for the kitchen last week during the public holiday, and realised how much I miss whipping up yummies from time to time. This time I added about three teaspoons of HONEYSPREE‘s Creamy Clover Honey to my pancake batter for a slight hint of natural sweetness. I really love the fact that they are adorably heart-shaped, you can get the pancake mold from Daiso! Pretty sure it works with eggs too, although I have yet to try that.

If you missed my previous pancake post containing the recipe I used, >>> ♥ READ IT HERE ♥ <<<

Sometimes following recipe measurements isn’t enough to make it good, the right amount of milk so they don’t spread too thin, the quality of the flour and eggs can determine the taste… How much butter to use so it doesn’t stick to the pan and yet not turn out too greasy, and then you still have to know when to flip it so it doesn’t burn. It’s much like everything else in life, making pancakes; it takes practice to get it right. But when you put a few things together correctly, with the right treatment, in the right amounts, you’ll always get something good that will be well worth the effort. :)

Have a great week ahead! xx

something familiar… and a very basic pancake recipe

Honey pancakes with fresh strawberries… ♥

It’s been awhile since I’ve spent time in the kitchen, apart from last week when I made Hollandaise sauce with poached eggs. (Maybe I should write about that too…) It’s been even longer since I’ve had pancakes, so I decided to make some! I usually use a buttermilk pancake mix but I was feeling “original” so I made this from scratch. The original recipe claims to yield FLUFFY pancakes, but mine were anything but fluffy. I still liked how they turned out though, quite like Robin’s german pancakes, just that I didn’t add any salt to mine. If you’ve tried the pancakes at Ikea, this one comes pretty close.

A very basic pancake recipe:

1 cup self-raising flour

1 cup milk

1 egg

 Don’t think I have to go into how to make them, right? I don’t know if it was my choice of flour that caused them to not be fluffy but I did follow the recipe,  I did add about two tablespoons of honey to the mix though, gives it a subtle taste of honey! Best enjoyed with tons of butter and soaked in pancake/maple syrup. Whip cream is optional but it is a very welcome addition, especially coupled with fresh strawberries. It’s a real treat! These pancakes keep well too, I kept about 4 of them and ate them two days later and they were still yummy after being warmed up.

Enjoy! :)

%d bloggers like this: